 |
| Before - note the gaps and missing turn indicator holes |
The areas below the headlights and
turn indicators (“signals” to the Yanks) were rusted out, either completely or
paper-thin and flaky. My concern was how
far out of round they were. Would they
match the diameter and shape of the headlight bezels? This problem finally made it to the top of
the list. Crack on.
I had ordered repair rings from
Classic Sunbeam, but I hadn’t taken the time to fine tune the fit. To fine tune things, I needed to clean up the
headlight buckets and the headlight cradle (the inner bucket with the
adjusters, the thingies that adjust Alphie’s stare). (I took the time to restore, meaning bead
blast, straighten and paint, the inner buckets and trim rings. With a Lucas headlight, they look smashing –
see the before/after pic.)
 |
| Before and After - I love a well restored part - TIDY! |
With the buckets in place, I
installed the headlight bezels… I have two
pairs: one pair is chromed, and the other is painted. I thought the chromed ones may have been
aftermarkets, but I noticed the mounting tabs look the same on both pairs, so
maybe chrome was an option. The painted
ones are pot metal, and someone tried to pry one of them off and bent it, and
it’s a bit out-of-round too (see pics). I
haven’t tried fixing it yet, and I know that if I break the piece off, I can’t
re-weld it – I’ll attack that problem later.
Besides, I kinda like the chrome ones.
 |
| People, Don't pry parts! |
The thing is the chrome bezels are
slightly smaller than the painted ones.
I discovered this as I was comparing the match between the headlight
openings on the wings and the mounted headlight buckets and bezels. I also discovered that I would never get them
to match exactly. It could be that
Sunbeam used the thick gasket between wing and bucket to mask the mismatch; I
don’t know, not having a factory unrestored car to compare to. (Judging by other Sunbeam fit and finish features,
door gaps, etc. they probably didn’t worry about getting an exact match.)
 |
| A tad out of round |
My pictures are rubbish, but maybe you can see that I got the outside curve to match the bezel passingly well, but on the inside curve, the wing sticks out just a bit.
Once I got the fit as good as I could,
I welded the repair ring to the headlight opening and fitted new metal below
the headlight. Next step…
 |
| It appears I used the Playboy fuzz filter, but wing matches the bezel on the outside. (chrome bezel) |
 |
| It's hard to see with the blur, but the inside curve doesn't match as well. (painted bezel) |
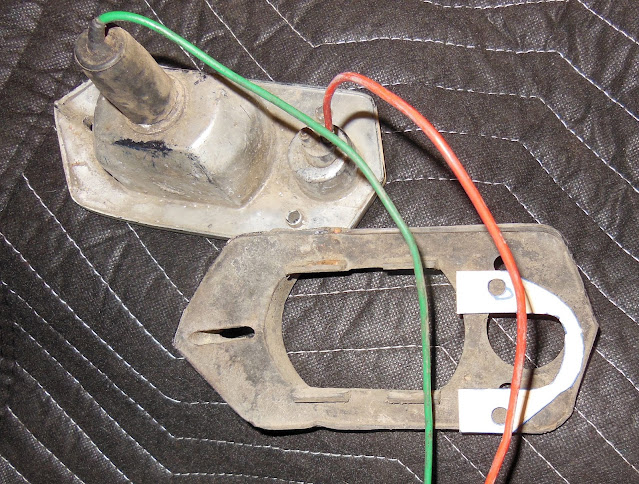
Turn Indicators: On both sides, the screw holes where the turn indicator assemblies mount had rusted through, and I didn’t trust their placement given all the “adjusting” I did to the headlight openings. On the passenger side someone had drilled a second hole and there were remnants of brass, indicating a brazed “fix” at some point. So off to the shed to find the turn indicator assemblies for a match up.
 |
| With shrinking cuts, but without turn indicator holes. |
 |
| Indicator hole template made using the indicator gasket |
Next problem were the vanishing
and misaligned screw holes. On the
passenger side, they weren’t there. On
the drivers, they were in the wrong place.
Passenger side first: using the assembly-to-body gasket as a guide, I
made a paper template with the holes, see the pic. Transferred the paper to 16-gauge metal and
fitted it to the opening. I drilled oversized
holes to give some room for adjustment and tack-welded it in place. With the assembly installed, I scrooted the
fit from outside and inside the wing. I
refitted and trimmed as needed until I had the final fit. I MIGged everything including the shrinking
cuts, re-installed the assembly and re-scrooted. I can’t emphasize how much scrooting!
 |
| All welded in but it needs grinding. |
The driver’s side got similar
treatment, but I only needed to weld up the holes and added a tab of metal for
strength. Both sides needed some final
grinding to finish the fit.
The factory used sheet metal
screws to attach the assemblies to the body, but that seemed insufficient. I got some #6X32 screws and nuts, re-installed
the assembly with them (scrooted the fit again) and welded the nuts in place. Tidy!
 |
| I can see that it doesn't fit tight to the opening. Adjusting the bucket/wing fit will close the space. It fits the top of the wing. Some slack please! |
 |
| Another view. Looks better from this side. |
 |
| Sorted, Brilliant! |


2 comments:
What a fun read my friend…..having spent many an hour working with you on prior projects…I hear your voice in my head as I read….you’re speaking with your bad Britain accent…lol
I call them "gratuitous Britishisms"
Post a Comment