
Alphie’s on the ground so time to reattach
some appendages, but first I must treat some wounds and, of course, some
cancer.
Bonnet
I have two bonnets to choose from. The first, dubbed “Bonnet Pins,” has holes
for hood (sorry, bonnet) pins that someone of yesteryear thought an Alpine
needed. Since Alpine bonnets hinge from
the front, any air pressure that miraculously builds beneath it will only push
the back of the bonnet up. And with a
little 1600 cc four-banger churning along, that kind of air pressure would only
come from outsized weather phenomena. My
guess is that whoever was more concerned with a dodgy bonnet latch than blistering
performance.
 |
| Bonnet pins on a Alpine are like a DVD rewinder... |
The other bonnet has no holes, but suffers more from the lumps and cancer, which are less treatable, so I went with Bonnet Pins.
Bonnet Pins is a replacement, revealed by the cracking bright red lacquer paint beneath the black and the three holes for the Rootes Group badge at the front edge. (Only early models – Series I, II and II - had bonnet badges. Series IV and V moved the badge to a center bar in the grill opening.) As it turns out, other than the pins, Bonnet Pins is in good nick, no dents with only some small issues on the underside.
 |
| Stripped, it all has to go! |
The Fix
First up, to the metal! I have my no-old-paint policy, but with the cracking lacquer it is even more important. Lacquer paint is not very flexible and tends to shrink over time, hence the cracks. And it will continue to shrink and crack beneath new paint, so I have to go to metal on the bonnet. Quick fix here – heat gun, razor blade and 40 grit on the random orbital. I got to the crannies with a 2” disc on my angled die-grinder.
 |
| The red paint is from early model Alpine |
Second, filling the bonnet pin holes, which were drilled through the supports below the skin as well as through the outer skin itself. A relatively simple fix: cut a small piece of 16-gauge sheet metal, hold it with a magnet beneath the hole in the support and weld away. A quick grind, a dab of JB Weld and done. Same for the holes in the outer skin, although I may not use JB Weld on the outer skin.
 |
| The grey blotches are JB Weld over the stress cracks and welded up bonnet pin holes |
Doors
In this case, the passenger’s door
– I haven’t got to the driver’s yet. You
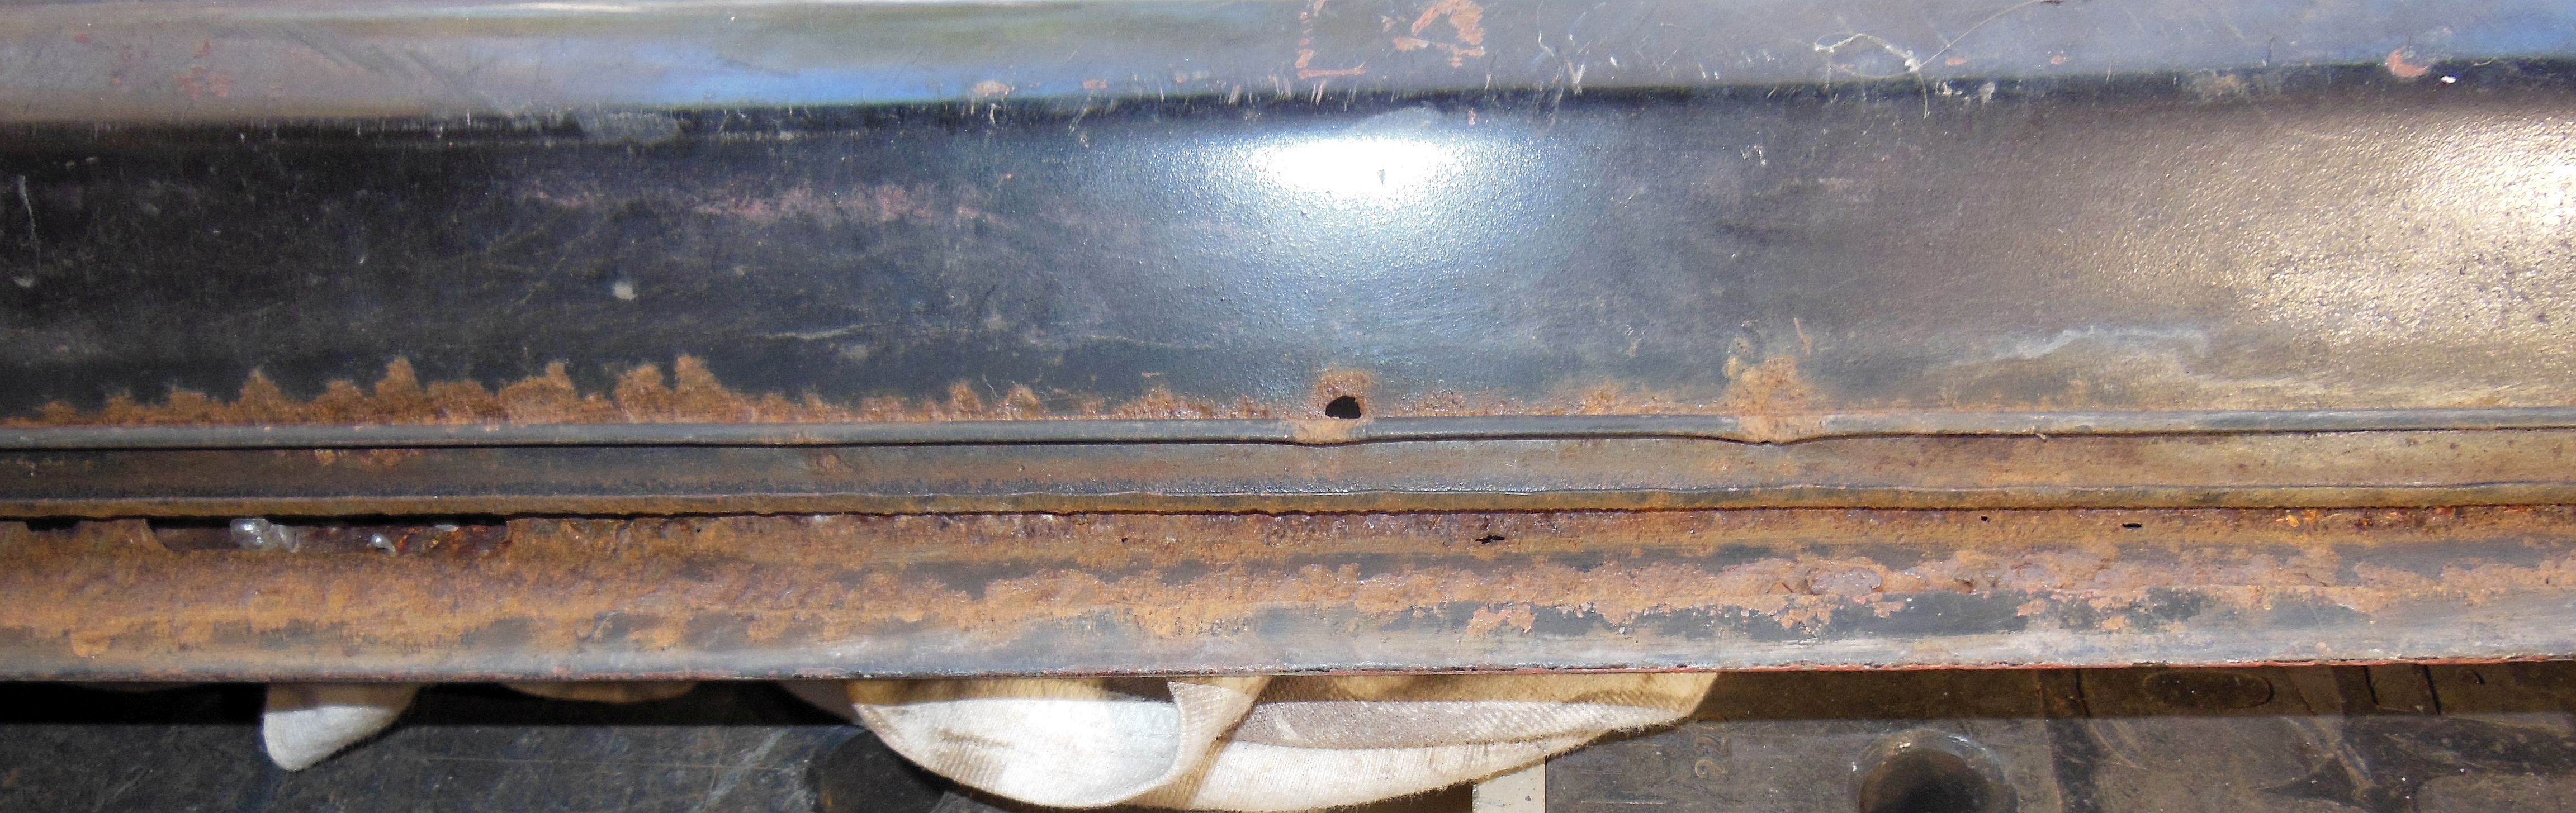
will be underwhelmed to learn that Alpine doors grow cancer along the lower lip,
partly because the drain holes get clogged but more from the lack of any semblance
of factory seam sealing. In the pics you
will see that the length of the lower lip has effectively rusted through. There are other issues: a rust through on at
the lower front edge of the outer skin, a rust through on the inside upper front
corner and a curious rust crack at the top inside corner at the back inside
edge next to the window fuzzy.
 |
| The before shot, cancerous but not as bad as the rocker panels |
Grind on Macduff! First, I ground off all the rust. I used a cutting wheel on the 3” grinder and
Dremel tool to get some clean edges where I can weld in some new 22-gauge sheet
metal. I used thinner sheet metal so I
wouldn’t put much heat into the welding.
I’ll seal up the seams from the inside once I have everything welded and
cleaned up.
Some close-ups on the rust
 |
| It's worse than it looks in this pic |
 |
| In the pic above, this section didn't look that bad, but the more I cut-out, the worse it got. |
One of those “Didn’t-See-That-Coming”
moments: After I gleefully cutting away
the inside lower lip and effectively detaching the inner support from the outer
skin of the door, I noticed that the gap bowed out in the middle of the
door. Oops, so, which is the straight
edge? The inner support or the outer
skin? And how big should the gap be? How am I going to measure it? Bollocks!
 |
| This gap is WAY too big, I had no reference of the correct gap |
After a bit of head scratching, I figured that the door skin MUST be a straight flat line. If it bows out, there is no way to fix it except to cut it up again and start over. To guarantee that the outer skins is straight, I dug out a piece of square-stock and clamped it so that it forces the outer skin into a straight, flat line. The bar closed the gap and straightened things, sorted!
 |
| The square stock ensures that the outer skin is straight It also closed the gap |
Some more pics of the other "blemishes."

A small rust through caused by water pooling under leaking seals
Not fixed yet
A rust through on the outer skin - not fixed yet
Door is upside down - this is the lower front corner
Blurry pic but you can see the cracks, a rust almost-through
Boot Lid
Welded up - it will need some finishing
The boot lid work is also on page Thirty-Four
(November 14, 2022 post), but here it is again with a some new details.
The boot lid was riddled with cancer
along the bottom edge and near the hinges.
It has also suffered a few blows over the years, but it’s the one that
came from this car and its fit is virtually guaranteed.
 |
| Rust throughs at the corners |
 |
| More rust throughs |
 |
| Rust through the outer skin and inner support |
The Fix
First the tried-and-true heat
gun/razor blade trick to scrape off old paint and plastic filler. Someone did some good work with the filler,
but I’m not trusting old filler, and along with my bare metal policy, I want any
filler to be as thin as possible, no filler poured over rusty metal. Filler will only fill imperfections of my
imperfect welds.
 |
| Patch welded in place |
 |
| Grounded welds, ready for finishing |
On the inside lower lip, I added a
few strips of sheet metal but mostly welded up the rust through using welding
rods and MIG wire and grinding away the excess.
The holes in the outer skin,
however, required fitting sheet metal to the holes. I cut the holes into rectangles to ease the
fitting. Clean metal to clean metal made
welding quick and easy without much heat soaking.
 |
| Make-shift stress crack puller. The cracks are caused by forcing the boot lid closed on stiff hinges - OIL THE HINGES! |
 |
| Straightened (with help from the Stud Welder) and welded |
 |
| Ground welds |
 |
| Some JB Weld and they disappear |
 |
| Lower boot lid lip - sorted |
 |
| Crackin' boot latch |
Next up – sorting the engine
compartment channel and fitting the bonnet.


