Tuesday, January 17, 2023

Page Thirty-Seven - Blue Bonnet Blues or Minding More Gaps


If we were to put Alphie on some kind of laser measuring device, we might discover that his snoz is a tad shorter on the passenger’s side, maybe tweaked to the right a skosh – but no one is going to do that so back off!

Pardon the outburst, OK let’s back up a bit.  The first bonnet, the early model one, didn’t match the curve of the fenders (sorry, wings), and when I stood the early and late model hoods (sorry, bonnets) together, it was clear that the early model has a slightly more pronounced arch as it dives to the front.  Easy enough to fix, head to the shed and fetch the other one.  Give me a day to sand it down, pull some dents on the underside and weld up the holes the previous mate drilled trying pull out a dent, and apply the hammer and dolly to some wrinkles in the outer skin.  Great, sorted!

I tossed it on Alphie, bolted it to the hinges (not so easy with only one bloke), adjusted it a bit and eyeballed the fit, hmmmm…

Problem areas - essentially, Alphie's snoz is skewed
to the right one smidge
Good News, Bad News (of course):  Let’s start with the good.  The bonnet matches the curve of the wings, solid news.  The bad – the gaps are all over the place.  The passenger’s side front corner gaps are so tight that the bonnet almost wouldn’t close, but the gap at the scuttle (it’s a real thing, a British thing, look it up) are cavernous.  Front corners:  Driver’s side, acceptable. Passenger’s side, nonexistent, in fact this corner is the problem.  It throws the bonnet askew.  Back corners: Driver’s side, pinched to closed.  Passenger’s side, gaping!  Check the pic above.

Late and early bonnets
Early has a slightly
sharper
curve

Assessment:  The passenger’s side of the snoz is slightly shorter (by a couple of millimeters) than the driver’s side, effectively making the bonnet appear crooked on the car.  Maybe I should have laid the bonnet in place when I was fitting the transplanted snoz…  Water WAY under the bridge, horse WAY out of the barn, ship WAY out of the port, add your favorite trite saying.

I fiddled with the hinges for more than an hour, moving the bonnet around within the adjustment margins of the hinges, but nothing would fix it. I could adjust the gap at the front passenger’s (right) corner, but it made the left front corner gap huge.  I could open one side of the scuttle corner, but it screwed up the other.  Finally, I could see that the right-side front corner was the key.  It has to open to get all the other gaps to play well together.  It’s fixable but not without cutting and welding.


Gaps before cutting wheel attacks

Driver's side gap at the scuttle - TIGHT!

Passenger's side at the scuttle - GAPING!
Somehow the pic makes the gap look smaller?

I chose to set the gap at the bonnet's front lip (since it’s the most immediately visible) and adjust everything to it.

Awesome Drawing:
The "Fix" isn't perfect

How to close/open the gaps?  Closing them?  Easy, weld in strips of sheet metal.  Opening them?  Easy too but at a price.  Cut a space the size of the cutting wheel edge along the pinched gaps, “contraction spaces” if you will, and pull the gaps open to close the space I had cut.  This method means more body work and filler, but it works.  Awesome drawing!


Passenger’s front corner.  After all, it’s throwing everything off and maybe, with it fixed, the other areas will magically fix themselves.  Car restoration requires a fair amount of magical thinking and delusion.


Contraction Spaces welded
The hole shows how much the gap had to open

First layer of filler to see how "fixed" it is
It will need fine tuning but the gaps are almost there

Driver’s side scuttle corner:  The open-the-gap-by-cutting-a-space method didn’t work here because the gap was too close and because two body panels meet here, which significantly stiffens the metal.  No way around it, cut the gap open and weld in metal to recreate the rain gutter. 

Assessment:  Without going into painful detail, cutting contraction spaces to open the gaps works, but it ain’t no miracle!  In some places, it makes the edge of the rain gutter where the bonnet nestles into the body more angled.  I made an awesome drawing to illustrate.  Along the driver’s side, I can live with the extra angle.  The pics (I hope) tell that story.  It also leaves some lumps where there were no lumps before.  All fixable, but tedious and time consuming.

Driver's side at scuttle - some bloody metal here

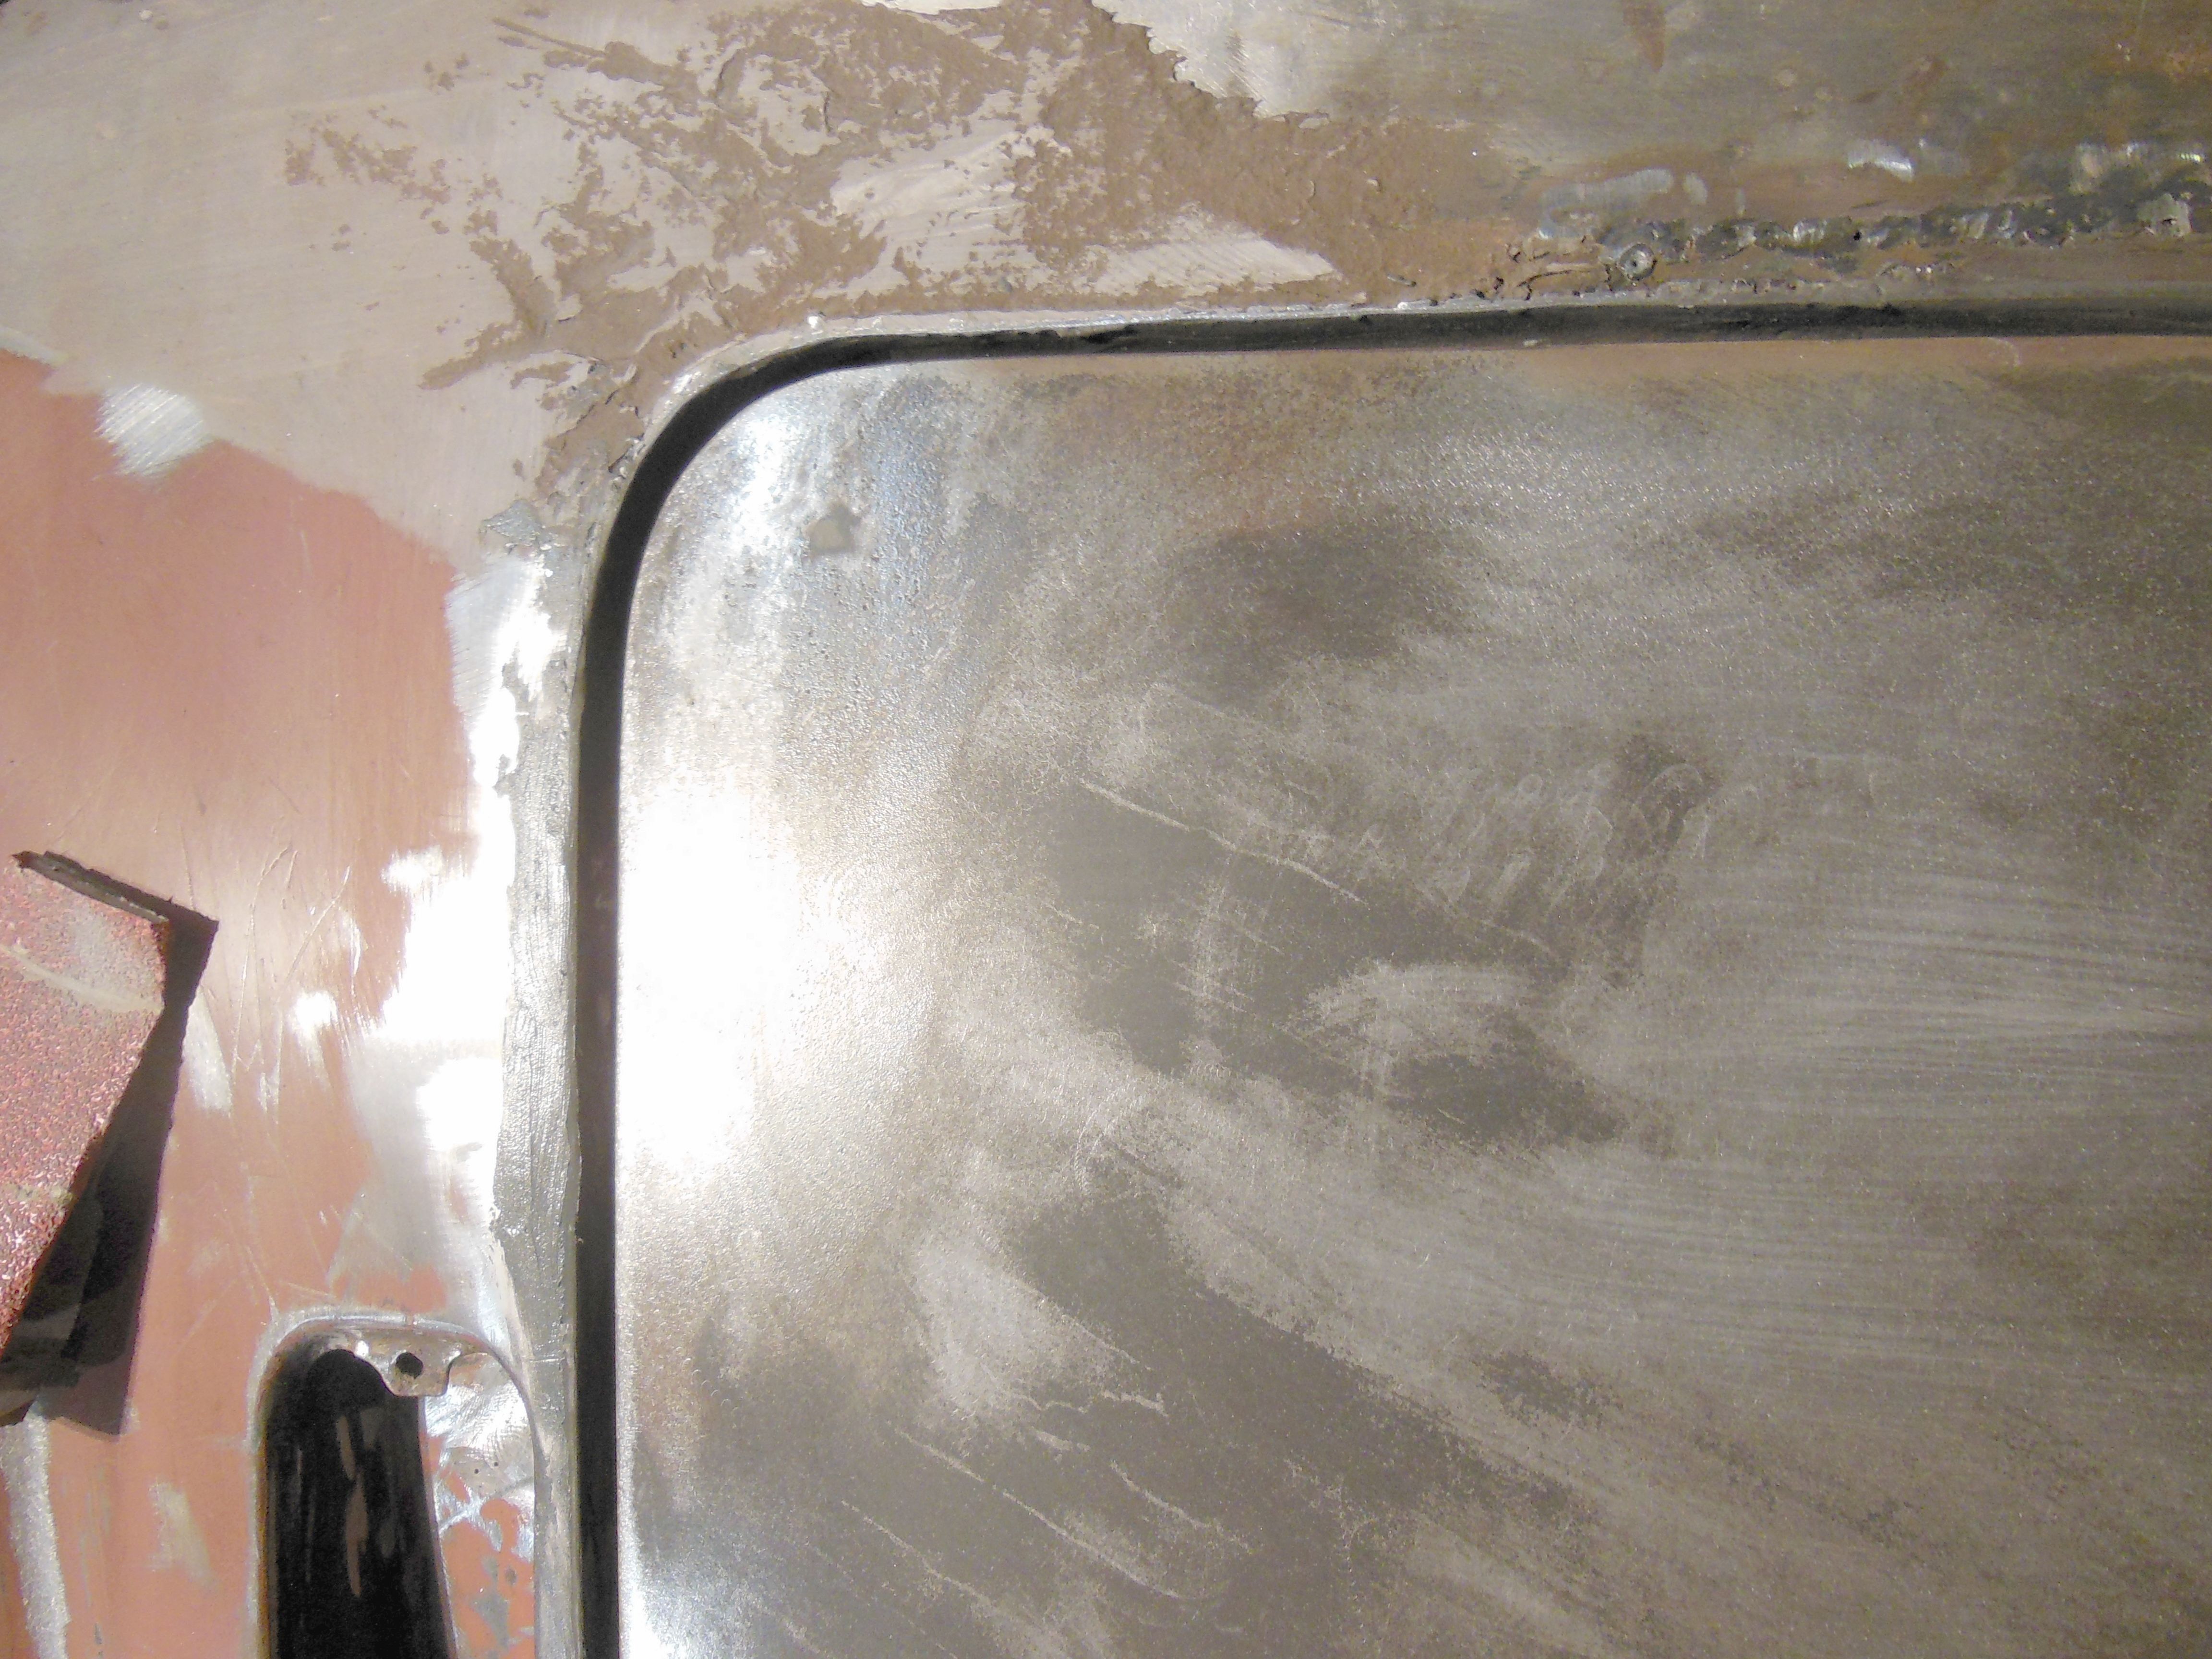
Driver's side at scuttle - corner rebuilt

Driver's side at scuttle with bonnet open
Rebuilt corner with JB Weld to hide everything
Lots of work commenced!  Cutting spaces to open the gaps; cut and fit sheet metal strips; weld in the strips and clean up the welds; pull open the gaps and weld the closed-up spaces; grind down the welds; hammer and dolly the spaces and welds to get things as smooth as possible; slather on some plastic filler in hopes I can hide all the rhinoplasty.

The gaps aren’t perfectly uniform, but if no one measures them, I’ll get away with it.  I can go back and massage some areas to get them more uniform, but the broad strokes are done.

The bonnet fits, and the gaps are good but not uniform
Needs fine tuning for uniformity and shimming to get surfaces flush


Tuesday, January 3, 2023

Page Thirty-Six - Minding the Gaps

 
Slapping on a replacement panel is easy, getting everything to snug up is the tricky bit.  As I have droned on about earlier, I replaced Alphie’s snoz, but I’m only now finding out if I did a good job or not.  Some good news, some bad news.

Bad news first – the bonnet doesn’t fit!  There is a gapageddon between the bonnet and the wings.  The passenger’s side is worse than the driver’s, which is curious.  So, what’s the deal?

Some possibilities:

1)  Alphie had an early model bonnet on the excised front clip – you know, the clip I hauled off to the recyclers.  Maybe the wings were also early model transplants and the bonnet fit the curve of those wings, not sure and no way to check it.

2)  Maybe, just maybe, I didn’t get the snoz fitted as well on the passenger’s side as I did on the driver’s side.  It seems unlikely, but never underestimate my ability to $*@! up.

3)  Maybe the other bonnet fits – the one that came off (and fit) the Organ Donor’s wings currently glued to Alphie’s frontage.  Please, please, let this be the problem…

I noticed an interesting feature on the underside of the early model bonnet that isn’t on the late model, a cutout for what seems to be either a fresh air intake near the carb or a clearance cutout for something.  The late model one has some minor dents, but it is the correct model bonnet so I’m really hoping option #3 is the deal.

Left - late model, right - early model
The late model doesn't have the cut out and is curved slightly more gentle
The early model has a flatter leading edge - no wonder it didn't fit

Bad Bonnet - it doesn't match the curve of the fender
It's worse on this side than the other
Good News – the body gaps are pretty darned spiffy!  Passenger’s door first - I was most worried about the gap between the front wing quarter panel and the door.  They were irregular, but not that bad.  The worst spots were at the top front where the new snoz mated to Alphie’s bod and the rear top, both gaps were big.  Opening a tight gap is actually harder to fix.

There was also a problem at the rear lower edge of the door.  The pics tell the story fairly well, and I know, I have to put filler in that area to cover the welds, but I don’t want filler on an edge because it chips too easily.

Lowes sheet metal patch

Glued and ground - Needs clean-up
but the door will be flush
BUT before I broke out the might MIG and started burning metal, I spent some time (OK, several hours) monkeying with the hinges, both where the hinges attach to the body and where they attach to the door, seeing how much of the problem I could solve with adjustments.  Turns out, a lot.  It’s a fiddly job, but to get all the gaps tight before we spray any paint.

The fix came from Lowes in 16- and 22-gauge sheet metal.

Top front of the door:  The factory used lead as filler over the weld where the front clip attaches to the body.  I’m using fiber glass reenforced plastic filler, but remember? No filler on edges that can easily chip.  So, I had to weld in a metal edge.

It was simple enough, really.  I cut a piece of 16-gauge sheet metal, bent it to fit the curve of the wing, and MIGged it to the wing.  Next, I reattached the door and wiggled it into position – funny how you get better and holding up the door while screwing in 8 hinge bolts by yourself after having done it about ten times…  With the door back in place, I marked a line on the sheet metal at the edge of the door and went to town with a cutting wheel.  Some grinding, a few more welds and I had a dam that the plastic filler could fill up against.  I globbed some reenforced plastic filler over the snoz weld to get an idea of how close I am.  It’s pretty darned spiffy!

A small filler dam, partially welded
The cut-line is barely visible in the pic

Cut and ground to level with the door edge

Close up with the first layer of filler 
I'll hide the weld edges with JB Weld, but the gap is good

Top rear of the door:  This gap was an even simpler fix.  After mimicking the curve with my Harbor Freight contour gauge, I drew out the curve on a 16-gauge piece of sheet metal and cut it out.  A few dozen trips to the belt grinder later, I matched the metal to the curve of the rear wing.  Banged it in with the MIGger, ground the welds and rechecked the fit.  It clearly closed the gap, but not enough.  I revisited the steps above but with 22-gauge sheet metal this time, MIG, grind, recheck the gap – sorted!  See my awesome drawing.

Awesome drawing of 2 shims,
first, 16 gauge, second, 22 gauge

Shims glued and ground

The shims closed up the gap nicely
I had previously fitted the driver’s side door.  It has many of the same problems, but they are not as bad.  I’m currently mending some rust throughs, dents and other issues with the driver’s door, but it’s in much better shape than the passenger’s side. 

The door is snug and the gaps are almost exactly the same all round
I may still close up the forward gap some
I doubt that Rootes' fit and finish was perfect, but I can try
There is lots clean-up to do: JB Weld to smooth welds, filing/sanding to get gaps cleaner and more precise, probably some more MIGging as well as the finish body work.  The plan is to hide any evidence that I had to mind the gaps, so mum’s the word. 

I’ll post more pics and updates as I get all things that open adjusted.