The next skirmish in the battle
against demon rust, brings us to the left crumbly, ragged rear quarter panel.
Like all Alpines, water trickles
through gaps where Alphie’s roof meets body, down the inner wings, finally
spreading out along the boot floor, feeding demon rust. You may recall that the petrol tanks (again,
remember that Series IV Alpines have two tanks in each rear wing), which sweat
(and possibly leak) into the boot as well.
In short, a lush lair for rust!
Our cadaver studies provide a
pattern – we have two cadavers to consult for Operation Bodgy Boot Cheeks, the
Organ Donor and Bob’s Butt. (You
remember Bob’s Butt, the arse-end of a Sunbeam Tiger that Bob, my Sunbeam buddy
gave to me?) Bob’s Butt donated some flesh
for transplanting as well.
Like everything else on Alphie,
the rust goes farther than I expected, even though my rust expectations are
quite high. Cutting away the manky left
rear boot cheek revealed rotten inner fenders, cancerous sections of boot floor,
random rust-throughs, and a bent and rusty rear jack point, which was also
surrounded by more flaky sheet metal.
Peruse the pics.
 |
| Loads of Flaky Rot |
 |
| Cut away view - LOTS cut away! |
 |
| Cancerous inner-fender well |
 |
| An unbent jack point courtesy of Bob's Butt |
Usage Note: One jacks an Alpine using a rickety design where one inserts the jack’s square tube appendage into a square hole below the bumper. The hole is a length of square tubing, slightly larger than the jack’s appendage, which is welded to the frame at the rear quarter. Confused? The pics may help you visualize.
 |
| Using Bob's Butt to demonstrate, this is how an Alpine is jacked. |
 |
| Cut away showing how the jack point works |
I had to cut through a portion of
the square tubing to rend the jack point from Bob’s Butt, meaning I would have
to weld on a replacement length of square tubing to the excised jack
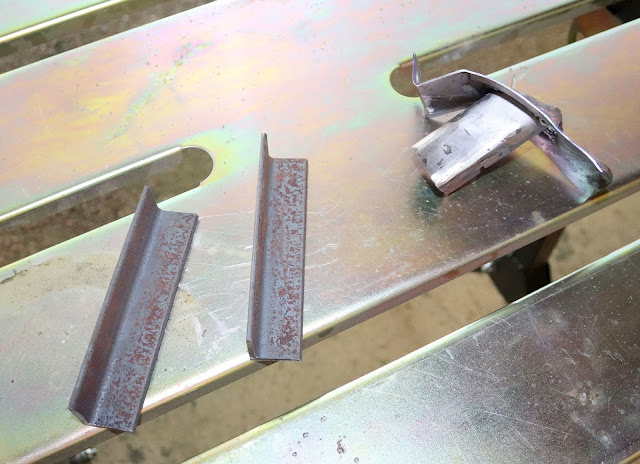
point. Turns out, Lowes doesn’t sell 1”
square stock in a beefy enough gauge to handle being a jack point. But they sell angle iron that can not-so-conveniently
be welded to create square stock. A
small pain but it didn’t take too much time.
Once I had cut back the sheet metal to cancer-free areas, I saw that when someone jacked Alphie at some point, he/she/it either were on uneven footing or the jack teetered with the car in the air – whatever the case, the jack point, the sheet metal surrounding it and, not surprisingly, the frame rail itself were bent. With careful application of grinders and Sawzall, I ripped the old jack point out, and with contortions worthy of a circus act, beat the frame rail back into shape with hammer and dolly, and judiciously scrubbed off the rust. The patient is prepped for her transplant.
 |
| Amputated jack point and its prosthetics |
I clamped the donated jack point from Bob’s Butt onto Alphie’s frame and marked cut lines onto Alphie’s butt pan. Next, I cut at the lines, and test fitted the new jack point. After some filling and other adjustments, fit was better than I expected. So, I welded the jack point to the frame rail first so that I had a solid, final placement. Some body-hammering and fitting lined up the jack point with Alphie’s butt pan, and some quick spot welds connected Bob’s skin to Alphie’s. The rotisserie mount obstructs finish welding, but I can get to it when Alphie comes off the rotisserie.
 |
| Old jack point amputated |
 |
| Cleaned and ready for transplant |
 |
| New jack point welded to the frame rail |
 |
| Skin graft - this will need finish welding and grinding |
With the jack point secured, I turn my attention to fitting the lower boot cheek patch panel. For now, it’s vice-gripped in place while I measure both the right and left fender lowers. I need to be sure that I have the patch panel in the correct spot, not too high or low. To get a fix on it, I’m measuring from the boot floor to the bottom of the right fender tip at the base of the wheel well using a framing level to get a precise and consistent placement on each side.
 |
| Test fitting the patch panel - needs tons of scrutiny and fitting |
At this post, I’m hesitant to cut
the rear wing anymore until I’m satisfied that I have the correct
placement. As it is, I will need to add patches
above the patch panel because I had to cut more fender flesh to get to the
rusty inner fender. I’ll update this
post as I perfect the patch panel’s fit.


